오브젝트 폴링의 개념
게임오브젝트를 생성, 파괴하는 것은 순간적으로 큰 성능 소모 및 프레임 저하를 발생시킬 수 있다.
따라서 생성, 파괴 대신 활성화, 비활성화 방식을 사용하면 순간적인 프레임 저하를 방지할 수 있다.
이를 오브젝트 풀링 기법이라고 하며, 동일한 여러 개의 오브젝트를 하나의 풀(예 : 리스트, 스택, 큐)에
미리 담아 관리한다.
파괴 대신 비활성화하여 풀에 저장하고, 생성 대신 풀에서 꺼내어 활성화하는 방식을 사용한다.
풀 내의 오브젝트는 파괴되지 않고 메모리에 계속 남아있기 때문에,
CPU 성능 소모를 줄이고 메모리 사용량을 더 늘리는 기법이라고 할 수 있다.
총알이 발사 하는 걸 생각하고 스크립트를 짜 보겠습니다.
처음에는 오브젝트 폴링을 안쓸때에 경우입니다.
먼저 Bullet 이라는 스크립트를 만들어 줍니다.
using System.Collections;
using System.Collections.Generic;
using UnityEngine;
public class Bullet : MonoBehaviour
{
public Vector3 direction;
public void Shoot(Vector3 dir)
{
direction = dir;
Destroy(gameObject, 5f);
}
// Start is called before the first frame update
void Start()
{
}
// Update is called once per frame
void Update()
{
transform.Translate(direction);
}
}
Bullet 스크립트를 만들었으면 위 사진과 같이 Spere 오브젝트를 생성하고 이름을 Bullet으로 만들고 머터리얼로 색깔을 빨간색으로 바꿔줍니다. 그리고 Bullet 스크립트를 컴포넌트 시켜줍니다.
그 다음에는 총알을 발사 시켜줄 Shoot이라는 스크립트를 만들어 줍니다.
using System.Collections;
using System.Collections.Generic;
using UnityEngine;
public class Shoot : MonoBehaviour
{
[SerializeField]
private GameObject bulletPrefab;
private Camera mainCam;
// Start is called before the first frame update
void Start()
{
mainCam = Camera.main;
}
// Update is called once per frame
void Update()
{
if (Input.GetMouseButton(0))
{
RaycastHit hitResult;
if(Physics.Raycast(mainCam.ScreenPointToRay(Input.mousePosition), out hitResult))
{
var direction = new Vector3(hitResult.point.x, transform.position.y, hitResult.point.z) - transform.position;
var bullet = Instantiate(bulletPrefab, transform.position + direction.normalized, Quaternion.identity).GetComponent <Bullet>();
bullet.Shoot(direction.normalized);
}
}
}
}
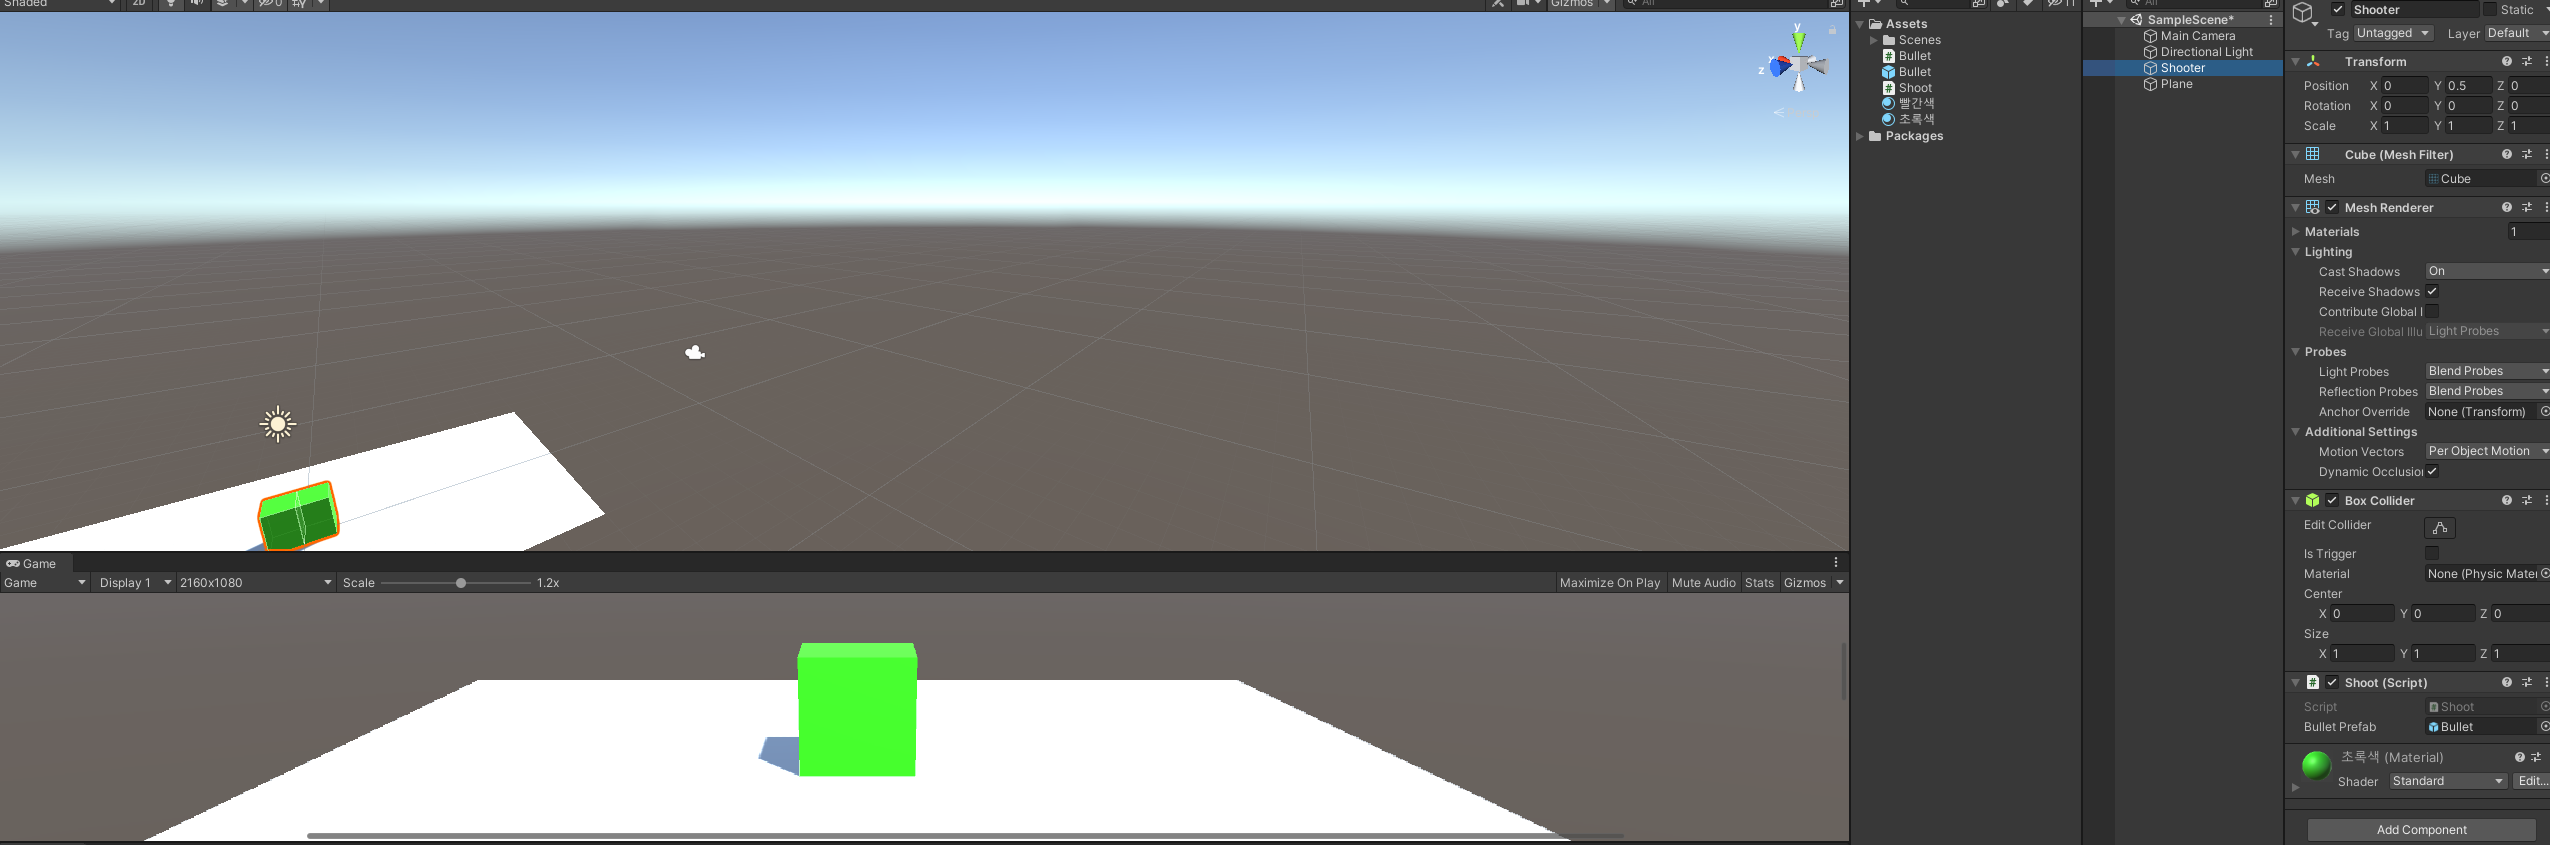
Shoot 스크립트를 만들었으면 위 사진과 같이 Cube 오브젝트를 생성하고 이름을 Shooter으로 만들고 머터리얼로 색깔을 초록색으로 바꿔줍니다. 그리고 Shoot 스크립트를 컴포넌트 시켜줍니다.
결과물은 이렇습니다. 영상을 보시면 약간의 렉 느낌이 있습니다.
다음은 오브젝트 폴링을 쓴 경우입니다.
먼저 ObjectPool 스크립트를 만들어 줍니다.
using System.Collections;
using System.Collections.Generic;
using UnityEngine;
public class ObjectPool : MonoBehaviour
{
public static ObjectPool Instance;
[SerializeField]
private GameObject poolingObjectPrefab;
private Queue<Bullet> poolingObjectQueue = new Queue<Bullet>();
private void Awake()
{
Instance = this;
}
private Bullet CreateNewObject()
{
var newObj = Instantiate(poolingObjectPrefab, transform).GetComponent<Bullet>();
newObj.gameObject.SetActive(false);
return newObj;
}
private void OnServerInitialized(int count)
{
for(int i = 0; i < count; i++)
{
poolingObjectQueue.Enqueue(CreateNewObject());
}
}
public static Bullet GetObject()
{
if(Instance.poolingObjectQueue.Count > 0)
{
var obj = Instance.poolingObjectQueue.Dequeue();
obj.transform.SetParent(null);
obj.gameObject.SetActive(true);
return obj;
}
else
{
var newObj = Instance.CreateNewObject();
newObj.transform.SetParent(null);
newObj.gameObject.SetActive(true);
return newObj;
}
}
public static void ReturnObject(Bullet bullet)
{
bullet.gameObject.SetActive(false);
bullet.transform.SetParent(Instance.transform);
Instance.poolingObjectQueue.Enqueue(bullet);
}
}
그리고 Shoot, Bullet 스크립트를 수정해줍니다.
using System.Collections;
using System.Collections.Generic;
using UnityEngine;
public class Shoot : MonoBehaviour
{
[SerializeField]
private GameObject bulletPrefab;
private Camera mainCam;
// Start is called before the first frame update
void Start()
{
mainCam = Camera.main;
}
// Update is called once per frame
void Update()
{
if (Input.GetMouseButton(0))
{
RaycastHit hitResult;
if(Physics.Raycast(mainCam.ScreenPointToRay(Input.mousePosition), out hitResult))
{
var direction = new Vector3(hitResult.point.x, transform.position.y, hitResult.point.z) - transform.position;
//var bullet = Instantiate(bulletPrefab, transform.position + direction.normalized, Quaternion.identity).GetComponent <Bullet>();
var bullet = ObjectPool.GetObject();
bullet.Shoot(direction.normalized);
}
}
}
}
using System.Collections;
using System.Collections.Generic;
using UnityEngine;
public class Bullet : MonoBehaviour
{
public Vector3 direction;
public void Shoot(Vector3 dir)
{
direction = dir;
//Destroy(gameObject, 5f);
Invoke("DestroyBullet", 5f);
}
private void DestroyBullet()
{
ObjectPool.ReturnObject(this);
}
// Start is called before the first frame update
void Start()
{
}
// Update is called once per frame
void Update()
{
transform.Translate(direction);
}
}
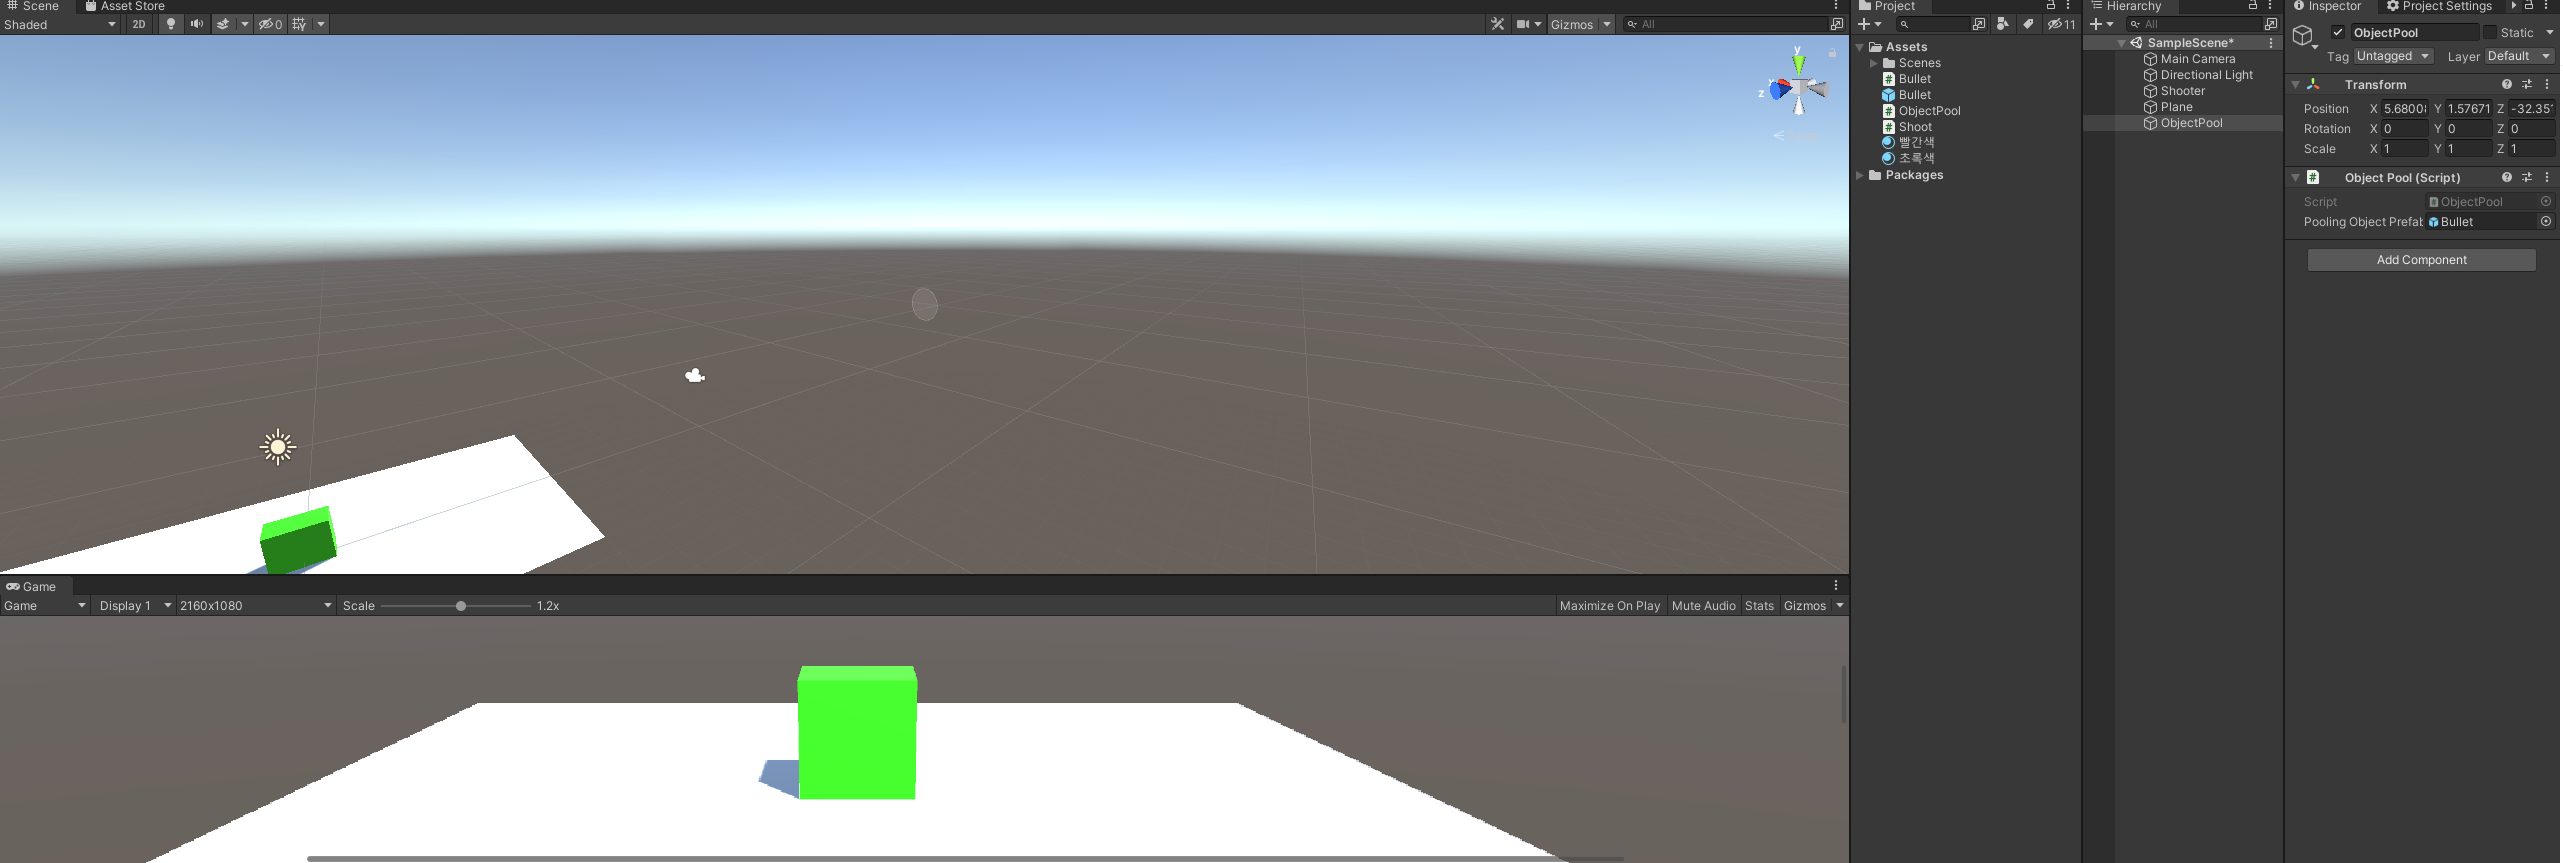
스크립트를 다 수정 했으면 빈게임오브젝트를 생성하여 ObjectPool이라고 이름을 바꾸고 ObjectPool 스크립트를 컴포넌트 시킨다음에 Bullet 프리팹을 넣어줍니다.
실행을 시키고 총알을 발사하면 ObjectPool 안에 비활성화 되어있는 Bullet이 활성화 되었다가 다시 비활성화 되는것을 확인할수 있습니다. 이렇게 오브젝트 폴링을 쓰게 되면 CPU 성능 소모를 줄이고 메모리 사용량을 더 늘릴수 있습니다.
'게임 개발' 카테고리의 다른 글
| 유니티 RigidBody 벽에 Collider를 넣어도 통과되는 현상 (1) | 2022.02.04 |
|---|---|
| 유니티 오브젝트 폴링이란?????? (1) | 2022.01.27 |
| 유니티 AI 구현하기(Nav mesh Agent) (0) | 2022.01.27 |
| 유니티 AI 구현하기(Nav mesh Agent) (0) | 2022.01.27 |
| 유니티 구글 애드몹 광고 넣는법 (1) | 2022.01.24 |


댓글